


Twelve months. Twelve chances to document how much they've grown.
Monthly milestone photos start as an intention and — if you do them right — become one of your most treasured records of the first year. Not because every shot is perfect, but because you end up with a visual timeline: Month 1 next to Month 12, and the gap between them is staggering.
The difference between milestone photos you'll keep and ones you'll scroll past comes down to setup. Not lighting rigs or professional cameras. Just a consistent visual anchor, a few deliberate props, and knowing what to do each month to make the photo feel like that month and no other.
This guide covers all 12, from the barely-awake first weeks to the "I won't stay still for a second" finish line.
The Monthly Number Marker
Every great milestone photo needs one thing that places it in the timeline — a clear marker showing which month it is. There are two purpose-built options, and the choice between them is purely about setup style.
Milestone pennants are sets of 12 mini flags — one numbered pennant for each month — designed to lean against a surface or sit propped beside your baby in a flat-lay or seated setup. Lucy Darling's pennant sets come in coordinating palettes (Mountain Fields, Flower Child, Little Artist, and more) designed to complement your setup without competing with it.
Felt milestone numbers are soft, dimensional 1–12 number sets in Pastel or Neutral colorways. They're purpose-built for flat-lay photography — lay the number beside your baby on a blanket, shoot from directly above. They photograph with a soft, textural quality that works especially well in overhead lifestyle setups.
Pick one. Both do the same job. Pennants work for propped, seated, and flat-lay shots. Felt numbers are a flat-lay dedicated tool. Either way, a consistent marker across all 12 months is what turns individual photos into a series.


Setup Principles That Apply Every Month
Natural window light, always. Turn off overhead lights and work with window light only. Position baby so the window is to the left or right of their face — not directly above or below. Side light wraps around features and brings out the warmth in baby skin in a way no artificial light replicates. Overcast days are your best friend; the diffused light is even and flattering. Avoid the hour around midday (roughly noon to 1pm) when outdoor light is at its harshest — it creates hard shadows even through glass.
Photograph when baby is fed, rested, and calm. Milestone photos take five minutes when the conditions are right and forty minutes when they're not. If baby is fussy, hungry, or overtired, wait. A short window after feeding, when they're alert but settled, is almost always the best shot.
Take more frames than you think you need. Babies — especially as they grow — move constantly. Shoot in bursts and edit down afterward to your one or two favorites. You won't catch the right expression on a single frame. What looks blurry or off in the moment often resolves into something you love when you review the full set.
Shoot from above or straight on. These are the two angles that work. Overhead flat-lay shots are clear and graphic. Eye-level shots — camera at baby's level, you on the floor — feel more intimate. Mix them across months to keep the series visually interesting.
Establish your background and keep it. A consistent backdrop across all 12 months makes the series cohesive. A neutral linen blanket, a woven basket base, a textured play mat — pick one and stay with it. The monthly variation in props and baby's growth give each photo its identity; the consistent background gives the series its identity.
Bring back the same stuffed animal every month. Place a familiar stuffed animal in at least one shot per month — either in the main frame or as a second photo alongside the milestone shot. By Month 12, the size difference between the animal and the baby becomes one of the most striking growth records in the whole set.
A note on editing. Even with good light, you'll often want to nudge exposure up slightly after the fact — just enough to open up the shadows without washing out the highlights. If the photo is well-lit, skip the heavy filters. Strong presets shift skin tones in ways that look off when you print. A small brightness adjustment and a slight warmth tweak is usually all a well-lit milestone photo needs.
Month by Month
Month 1 — Fresh and Wrapped
A Month 1 photo is about one thing: how small they are right now. You will never fully believe they were this small later. Keep the setup stripped back — a clean, neutral swaddle, nothing competing for attention.
Setup: Swaddle baby snugly in a textured neutral (oatmeal, ivory, soft grey). Lay them on your consistent background. Place your Month 1 marker beside them. Shoot from directly above.
Lighting: Early morning window light. Newborns are often their calmest in the first hour after waking and feeding.
One thing to add: A small measuring tape laid below their feet. You'll want to know exactly how long they were.
Month 2 — Eyes Open
Month 2 is when they start actually looking at things. That first real eye contact on camera is worth chasing.
Setup: Position baby semi-reclined on their consistent background surface. A lounger is ideal here — it holds them at an angle so the face is more visible than a flat lay allows. Place your number marker to the side.
Lighting: Direct window light from the side — this is when catchlights in the eyes make a photo.
One thing to try: Get low. Shoot at eye level rather than above. The change in perspective is striking.
Month 3 — The First Smile
If Month 1 is about size, Month 3 is about expression. The social smile arrives somewhere in here and it transforms photos entirely.
Setup: Lay baby on their back on your background. Have someone stand behind you and make noise — baby looks toward whoever's making them smile. Use continuous shooting mode. You won't catch the smile on a single frame.
Lighting: Soft overhead from a skylight or north-facing window works beautifully here.
One prop to add: Whatever makes them smile. For many babies at this age, it's a familiar stuffed animal just out of frame — bring it into frame for your second shot.
Month 4 — Tummy Time
They're pushing up. The arms are working. The personality is arriving.
Setup: Tummy time on your background surface. Prop the number marker in front of them so it's visible in an eye-level shot. Get low — completely flat on the floor — and shoot at their level.
Lighting: Keep overhead lights off and position close to a large window. Mixed light sources create color casts that are hard to correct in editing.
One thing to capture: The fists. Baby hands at four months, mid-push, are worth a close-up detail shot alongside the milestone frame.
Month 5 — The Sitting Attempts
The tripod sit is one of the most photogenic stages of the whole year.
Setup: Sit baby on your background surface with both hands in front for support. Have a second person close by as a spotter. Place your pennant beside them. Shoot slightly from the side to see that characteristic rounded-back posture — it's a distinctly five-month silhouette.
One thing to add: A soft prop in baby's lap. They'll reach for it, which keeps hands naturally positioned and gives the photo something to anchor.
Month 6 — The Halfway Point
Six months is the halfway point of the first year. It's worth marking accordingly.
Setup: Same background and lighting principles — but add one considered prop alongside the number marker. A single stem of eucalyptus. A seasonal flower from the grocery store. Something that places this photo in the specific time of year it was taken, not just the month of the year.
One thing to capture: Sitting independently if they're there. If not, the assisted-sit attempt photo is often better anyway.
Month 7 — Everything in the Mouth
Month 7 babies are a combination of delightful and impossible to photograph. They want everything in their mouth, including your marker.
Setup: Candid is your best strategy. Set up the background and props, put baby down, let them explore — shoot in burst mode and review afterward. The authentic frames will be better than anything posed.
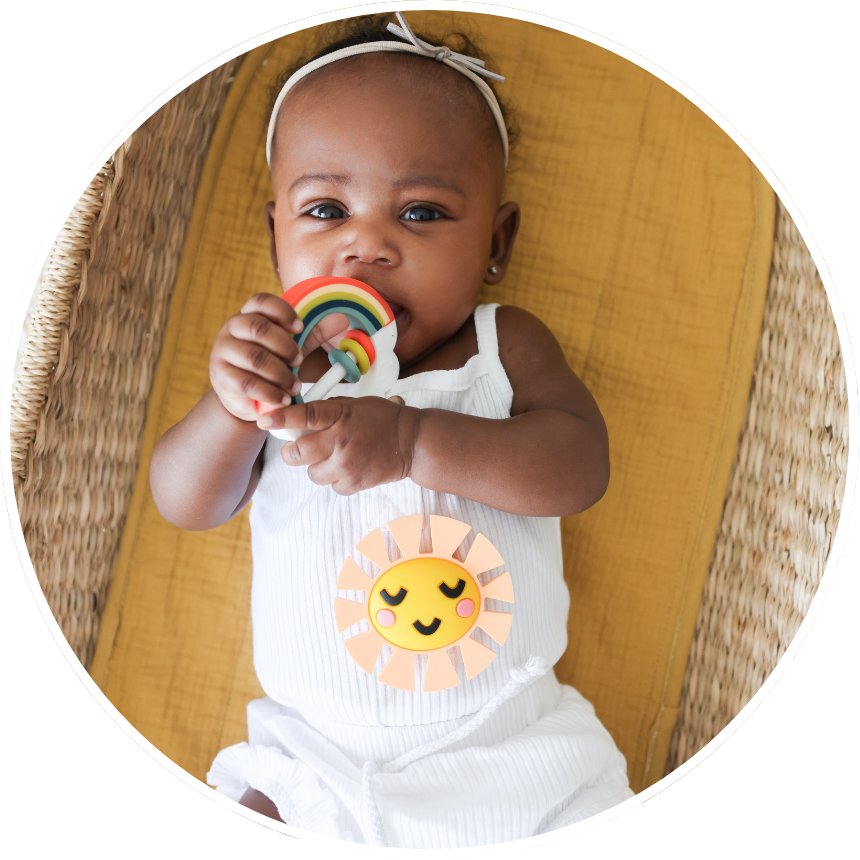
One thing to add: A soft teether as a prop. It gives baby something deliberate to reach for, and it photographs beautifully as a detail shot.
Month 8 — Sitting Strong
This is the month the baby starts looking like a person with a personality and opinions. The sitting-unassisted photo is a milestone within the milestone.
Setup: Seat baby on your background surface with no support. Step back slightly and widen the frame. At eight months, showing a little more of their environment — the nursery floor, the play mat, the light from the window — adds context that earlier photos don't have.
Month 9 — On the Move
Crawling babies do not stay where you put them. The solution is to put the camera in front of them and let them come to you.
Setup: Place your number marker slightly behind baby's starting position so it's visible in the frame when you shoot from in front. Get completely flat on the floor and shoot as they crawl toward you.
Lighting: Side window light at floor level creates shadows across the floor that look intentional and give the photo depth.
Month 10 — Pulling Up
Pulling to stand is one of those milestones you can actually stage without it feeling staged.
Setup: Place baby at a low, stable surface they like to pull up on. Position yourself behind and to the side. Have someone make noise from your direction to get them to turn and look. The mid-turn, caught-in-motion frame is often the best.
One thing to do: Shoot vertical (portrait orientation) for this one. The standing height deserves it.
Month 11 — Almost There
Month 11 has a particular feeling to it. One more month. They're almost walking, almost talking, almost something.
Setup: Very similar to Month 10, but push the framing slightly. Shoot at their eye level. Look for the moment when they're not looking at you — when they're focused on something across the room — and shoot then.
Month 12 — The Milestone
Month 12 is the one you'll print. Consider giving it a little more than the others.
Setup: Do the consistent setup first — same background, same angle, number 12 prominently placed. Then try one more: sit baby on the floor with all 12 pennants laid out behind them, or set all 12 felt numbers in sequence with baby at the end of the row. The full-set photo has a resonance that the individual months don't capture on their own.
One thing to do afterward: Print them all. All 12, in sequence, as a set. The Month 1 photo you almost didn't take is going to mean something next to the Month 12 photo of the kid who won't stop moving.
From Phone to Page
The photos are one half of what makes monthly milestones something you'll have forever. The other half is what you write down alongside them.
Lucy Darling Baby Memory Books have dedicated monthly milestone pages for all 12 months — not just a photo space, but specific prompts for what they loved, what they were working on, what made them laugh. The photo and the written record together are what turn a collection of images into something your daughter will sit and read someday.
The Memory Books come in 16 illustrated styles, each with its own palette and original hand-drawn illustrations. And if you already have the Milestone Pennants or Felt Numbers, there's a coordinating or complementary memory book design to match.
Getting your milestone photos sized and into the book is handled by the free Memory Book Companion App — no download required. Select your book theme, upload your photos, and it generates print-ready files sized for every photo space in your specific book. Print them anywhere and place them in.

The Ones You'll Be Glad You Took
Monthly milestone photos don't require a photographer, a studio, or a free afternoon. They require a consistent setup, good window light, and the willingness to get on the floor.
Month 12 will arrive. The photo you take the day before their first birthday — the one where they look impossibly grown compared to the swaddled newborn in Month 1 — will be one of the most meaningful photographs you own.
Start now. Or start next month. The best milestone photo is the next one.
Shop Milestone Pennants →
Shop Felt Milestone Numbers →
Shop Baby Memory Books →
Free shipping on orders over $75 at lucydarling.com.



Leave a comment